
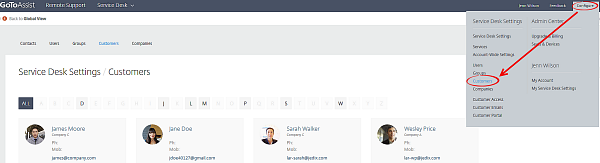
Manage Customers
A customer is any distinct individual who is listed as a contact on the account (either manually or through self-registration). Typically customers are a client of one or more of the account's services, though it is possible to have customers without access to any services.
When a customer is granted access to a service, they become available to be added for selection as the customer for all incidents raised on the service. If they are given portal access, they can log in to the Customer Portal to create and track incidents, search the Knowledge Articles and view messages. Customers can also be assigned to specific companies as employees.
About customer access and permissions
You can choose whether or not each customer on your account is given access to the Customer Portal, and can even customize the features and services to which they have access.
The level of Customer Portal access granted to a customer depends on a few different settings, as follows:
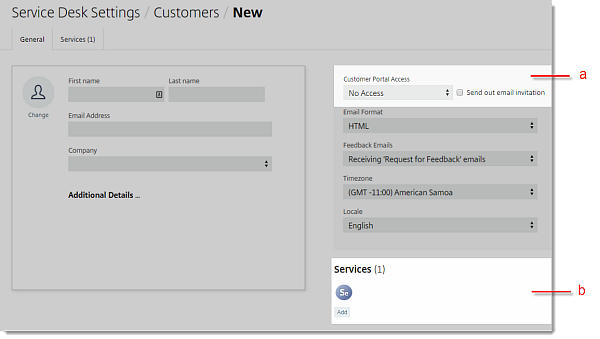
- (a) Customer Portal Access – This setting determines whether or not a customer is given access to the Customer Portal, and what type of access that may be (e.g., restricted access, admin access). If the Send out email invitation setting is enabled, new customers will receive email notifications inviting them to activate their new account for the Customer Portal. Customers can be given any of the following access levels:
- No Access – These customers have no access and cannot log in to the Customer Portal.
- Standard Access – These customers can log in to the Customer Portal and submit incidents only for the specific services to which they have been given access.
- Company Access – These customers can log in to the Customer Portal and submit incidents only for those services to which their company has been given access.
- Company Admin Access – These customers can do the same things as those with "Company Access", plus they can view and modify incidents submitted by other employees in their company.
Tip: You can update customer portal access individually, or choose to mass assign customer portal access levels to select (or all) customers.
- (b) Services – The "Access to Services" setting determines which services a customer will be able to log incidents for when they log in the Customer Portal (only those services to which the customer's company has access will be shown).
Create a new customer (manually)
You can add a single customer at a time as follows. To add more than one customer at a time, see Create multiple customers (upload via CSV) below.
- Click Save when finished.
- General tab
-
- Name & Contact Info – Enter the customer's details (e.g., name, email address) and select a company for the customer. Each customer can be assigned up to 1 company (or no company at all).
- Avatar – Click Change to upload a photo, icon or logo to represent this customer. This avatar will appear within Service Desk records affiliated with this customer.
You can upload any image size, but for the best quality it should be a .GIF, .JPG or .PNG file at least 61 x 61 pixels. It will be scaled down automatically.
- Additional Details – Click to add additional contact information about the customer (e.g., phone, job title).
- Customer Portal Access – Specify the user's "Customer Portal access", as described above.
- Email Format – Choose from HTML or Plain Text formatting for emails sent to the customer by Service Desk.
- Feedback Emails – Choose whether or not you'd like the customer to receive feedback request emails after an incident has been closed .
- Time zone – Select the time zone in which the customer resides.
- Locale – Choose the regional language for the customer (i.e., Deutsch, English, Español, Português, Français, Italiano).
- Services – Click Add to jump to the Services tab.

- Services tab
-
Access to Services – Specify the customer's access to services, as described above.
- Search Services – Use the search box to populate services by name
- Select Portal Access or No Portal Accessfor each service.
- Click the
 icon to remove a listed service.
 - Click Save when finished.

Create multiple customers (upload via CSV)
You can upload multiple customers at once using a CSV file. This is also useful for importing historical customer data from a former data-management system.
- A "Confirm Results" page will show you the customers that you are trying to add, as well as any errors that were triggered. Review and then click Save.

Export a list of customers
You can also export a .CSV file containing all of your customers.
- Click Export Customers at the bottom of the page.
Tip: To export specific customers, enter keywords in the "Filter" box.

Edit a customer
- Sign in to GoToAssist Service Desk with your email address and password at https://desk.gotoassist.com.
- Go to .
- Make your desired changes.
- Click Save when finished.
Delete or denylist a customer
If a user, customer, or admin is deleted, the personal identification information (PII) associated with them is automatically removed from our system and is displayed as a blank value in all associated record data.
- Sign in to GoToAssist Service Desk with your email address and password at https://desk.gotoassist.com.
- Go to .
- At the bottom of the page use one of the following options:
- Delete Customer – Click to remove the customer from the account.
- Delete & Denylist Customer – Click to remove the customer from the account and also add their email address to the denylist.
Create a compatible CSV file (for uploading customers)
In order to properly import customers using a .CSV file, you must adhere to the following rules or download a sample to use: